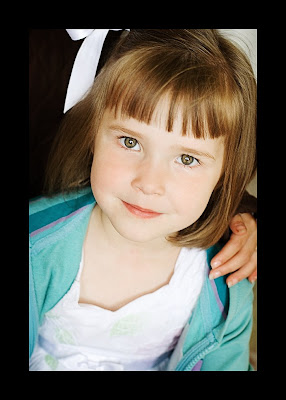
1. Open your photo. If you look closely, the photo is slightly out of focus. But I loved this shot of BB, so I had to try to save it. This shot has had no other editing done to it, it is straight out of the camera - just so you can see the difference. Generally, when sharpening you want to leave it to the last step.


2. What you will do, is create a duplicate layer of your image by clicking on Ctrl+J or by going to Layer>Duplicate Layer.
 3. Now we want to turn that layer you created into black and white. In CS2, you can do this by going to Image>Adjustments>Desaturate (Shift+Ctrl+U), in elements go to Enhance>Adjust Color>Remove Color, or just use the SAME shortcut of Shift+Ctrl+U.
 4. This is where we will be adding the high pass filter. Warning! This will look strange - it's supposed to. Have confidence! We know what we're doing :). Okay, go to Filter>Other>High Pass. A little screen will pop up, and your image will turn kinda greyish. In this little screen, enter a value of 10 in the box beside the word "radius". Click OK.
 5. Now to make your photo look normal again. We will change the blending mode of the grey highpass layer from normal to "soft light" over on your layer's palette. Remember how to change the blending mode? Click on the downward facing arrow beside the word "normal" and click on "soft light".
VOILA! I hope you can see the difference. It's kind of hard viewing it on here. Trust me, it saved a photo that was almost too out of focus. It's fast, and it works! Try it out for yourself :

BEFORE ...................................................................AFTER
And after running a couple of myboosts, here is the finished product!(a little oversharpened for the web, sorry)


10 comments:
Great tutorial! I am going to have to go back and try some of these when I get my software in.
Think you might could do one showing how you shoot in RAW and pull the images off the camera?
I am such a beginner here. Can you tell? :)
Cool! Thanks! I really look forward to your tutorials. Did you take classes on Photoshop or did you just learn by playing around?
I can't wait to try this! Love your tutorials!!
Do you know how many photo's have disgard because it was a little too much out of focus. Thanks for sharing this with all of us.
♡ You are AWESOME! I have tons of photos like this!!! Thanks so much! :)
I just recently discovered your blog & must say that I LOVE your tutorials! You have helped me so much with my Photoshop skills. Thanks for sharing your knowledge. I tried this one & it works great.
I certainly see the difference. This is just what I needed! I finally successfully executed something in CS2!
Check out mine:
http://blog.michellescrapbooking.com/glasses/
Thanks Bobbi!
This is great! I love it, can't wait to try it! Thanks. Also, your garden is beautiful and Congrats on your calling! (Congrats on being worthy and willing and capable actually!) You'll do awesome!
That is awesome!! Amazing how that works. Thanks for sharing :)
Thanks for the great tutorial! I'm a newbie to Photoshop but I love it. I have a pic that I would really love to make "unblurry" but I tried this technique and it is still not great I was wondering if you know of anything else to try?
Thanks
Post a Comment