

Once again, I'm slacking and sending you to another website for this week's tutorial because, frankly, their tutorial is SO easy to follow and so thorough, I can't improve upon it! It's from "Photoshop Essentials" and they take you through step by step, including screen captures to help you.
Now, here are a couple of hints I figured out while doing this.
1. Use a close crop of a face for best results. If you want it to stand out even more, burn the edges of the photo a bit before starting.
2. The smaller the text, the better. I wrote out what I wanted to say, then resized the font to size 4. Then I copied and pasted the text again and again until it filled the square. If you are unclear by what I mean, just ask me and I'll explain better.
3. Work from a COPY of your original image (i.e. open your image, then duplicate the image. Close the original). Just to avoid changing the original permanently.
You can crop the photo to any size - doesn't have to be a square. You can use any font, any text color - play around! You can always change it later. I'd love to see what you come up with. Please leave a link in the comments so we can all check YOURS out!
ETA:
Just a quick way to burn the edges of your photo (per request) ;)
1. Open your photo and select the burn tool from your tools palette. It looks like the hand pointing to the left. I have it circled in red. Then, at the top of the screen, select Range: Midtones and Exposure: 50%. You can change these values and play around a bit but for a quick burn, these settings work well.
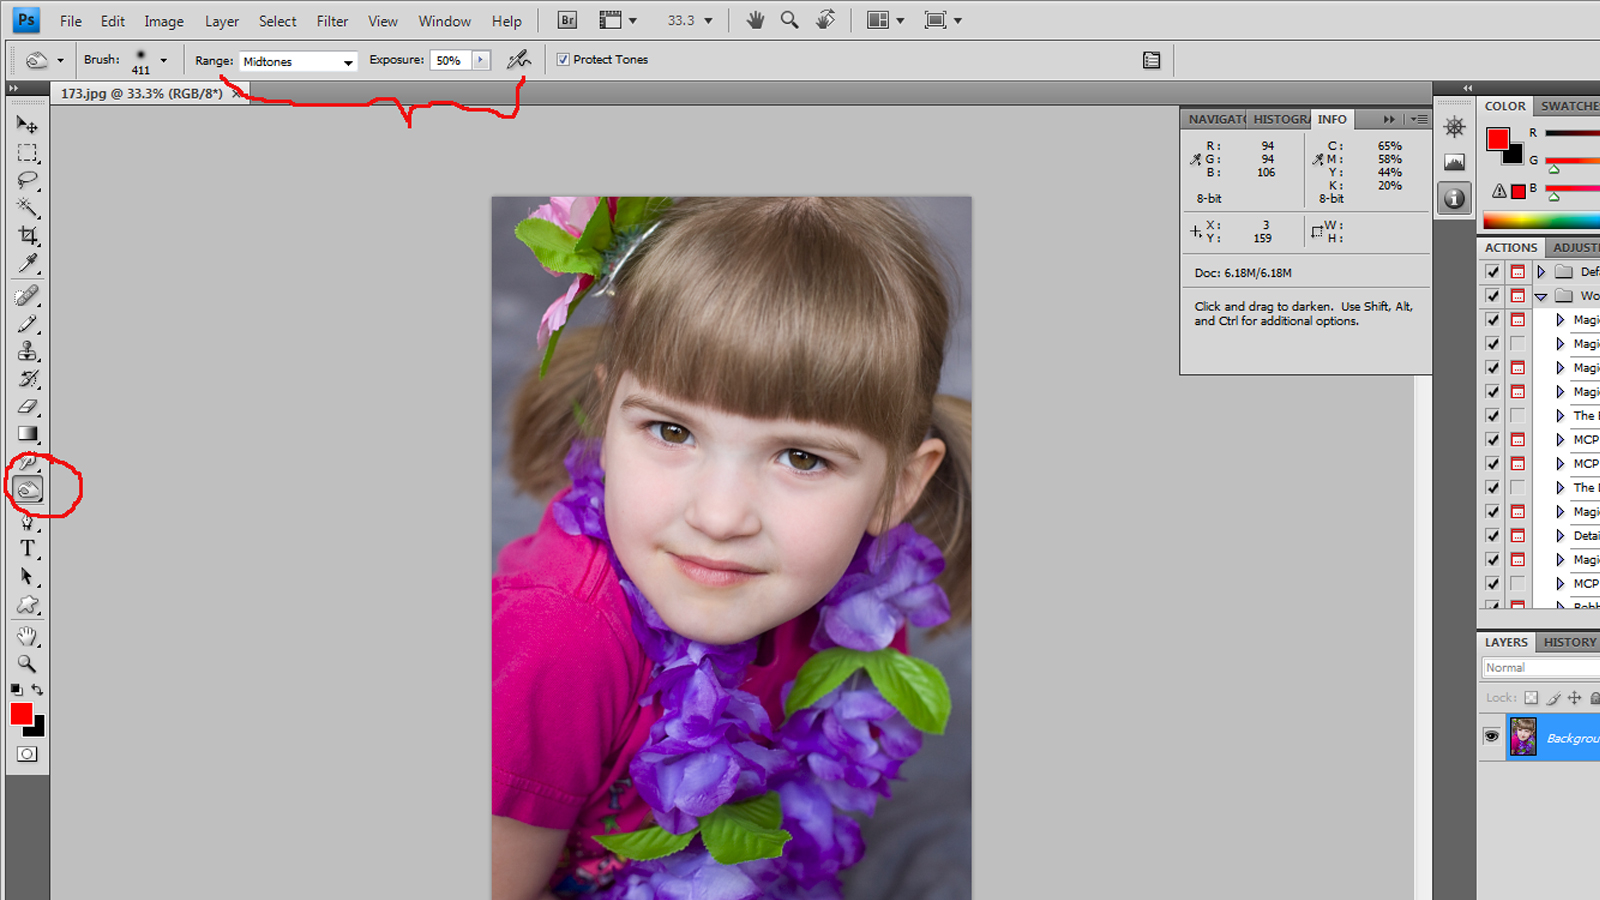
2. Now, move your mouse to the edge of your photo and while holding down the mouse button, rub your curser over the edges of the photo. It will gradually get darker and darker where you move the mouse. Do this around all of the edges until you get the effect you like.


7 comments:
Thank you Bobbi. I will check out the link. The only thing I do not know how to do is to burn the edges? I really love how your pohoto came out and it would be awesome to scrap.
mary
THAT IS IT, I CAN'T IT ANYMORE!
I AM GOING OUT AND BUYING PHOTOSHOP!
Thank-you Bobbi between the scrapbooking, the crafting and the photoshop you really help me spend more money. ha!
p.s. I was just kidding. you know I love you.
p.p.s. you don't have it post this. It was really just for you. but you can if you want.
Wow this is amazing. What a great idea. I am thinking this would make a great graduation thank you card but I dont have photoshop. I guess ineed to lok into this
Love it! Oh - and I finally made a decision and I've pre-ordered PS5. (Student Version $200) = Good deal!
Thanks for all your valuable help!
That's awesome!
awesome! thanks for sharing! wish you were to do photographs of the hubby and I :) hugs from conroe, tx!
Post a Comment