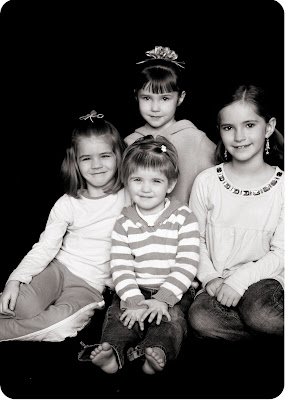
 I had a wonderful reader email to ask me how to do rounded corners digitally - for digital scrapbooking, or just for printing etc. I was so glad she emailed because I just never know WHAT people want to learn! So, I know at least one reader who will benefit from this tutorial :)
We'll use Photoshop Elements 5.0 for this tutorial, however it should work similarly with any version of photoshop.
1. Open the photo you want to round the corners on. This could also easily apply to a digital scrapbook paper, or whatever. Once your image is opened in Photoshop, select the shape tool from your tools palette. It usually looks like a rectangle, but it could also be a circle or whatever. When you click on it, a list of shapes will appear on the top of the screen. Click on the rounded corner shape, which is usually to the right of the rectangle. Now, here's the important part - in the box next to where it says "Radius" enter ".5 in". The color you choose won't matter. Mine is green just for this example.
 2. Now, move your mouse to the upper left hand corner of your image. Click and, while holding down the mouse button, drag slowly to the bottom right hand corner of the image. The shape will completely cover your image. You should notice that the corners of this shape are rounded, like you want your image to be. If the corners aren't round, check you entered the right number in the radius box. Click on the little checkmark when your done.
 3. Now, look to your layers pallete to the lower right hand side of the screen. Click once to highlight your background layer. Now, right click and select "Layer From Background" from the pop up list. Click OK.
 4. Now you will click and drag your background layer (now named Layer 0 or something like it) on top of your shape layer. You will notice you can see your image again.
 5. With your image layer above the shape layer, you can now group the layers together by clicking on Layer>Group With Previous, or Layer>Create Clipping Mask. You will then see the corners of your image round!
 6. Now all that is left is to merge the 2 layers together (Layer>Merge Layers). Then you are free to drag your photo onto your digital scrapbook page, or wherever!
 I hope that was easy to follow! It's a fun little technique that really softens the look of an otherwise boxy layout.

6 comments:
Love that picture of the girls.
*psssst* you forgot to tell me what was in your purse.
that is a BEAUTIFUL picture of your girls!
Sweet- I wanted to know how to do this... Thank you.
Awesome tut! And SO easy. Thanks for sharing.
Oh Thank you Thank you!! I haven't visited you for awhile but I have been telling my husband I need to learn how to do this. What does he tell me? Look it up on the internet. YIPEE!!! I finally learned :)
Just left you a comment on things I want to learn and then I found your tutorial. What if I don't want to scrapbook the photo after I round the edge ... what if I want to save to my photo folder?
Post a Comment