Hi everyone - I'm still working on a post about this weekend. I've STILL been busy, but I want this post to be something special (because I use it as my journal entry as well) so it will be up in a couple of days.
But, since it's Tuesday I want to share this fun technique that works in both full photoshop and elements, and can make something special of your photos. It's adding texture to a photo, and this is method 1 of many. Next week I'll show you another way to do it, with a different result. SO fun.
This method we'll simply be dragging and dropping a texture onto your photo and changing to blending mode. Before we get started, though, you'll need 2 things. 1. a photo you want to add texture to, and 2. a texture to add. While browsing around I found a great site offering FREE textures! Yes! So, click FreeTextures to go to their website, and you will browse through their many samples of textures until you find one you like. I liked this one:

1. So what I did was click on the thumbnail (the tiny picture of it) so I could see it bigger. Then I clicked below the larger picture where it says "Larger View". When that screen loads, you'll see a white screen with only the picture of your texture on it. Right click on the picture, and click "Save Picture As". Then save it somewhere you will remember where it is. I created a folder named "Textures" in my "My Pictures" folder in my computer. You can save it wherever you want to - even on your desktop, or in My Documents. Wherever. Okay. Let's open Photoshop now.
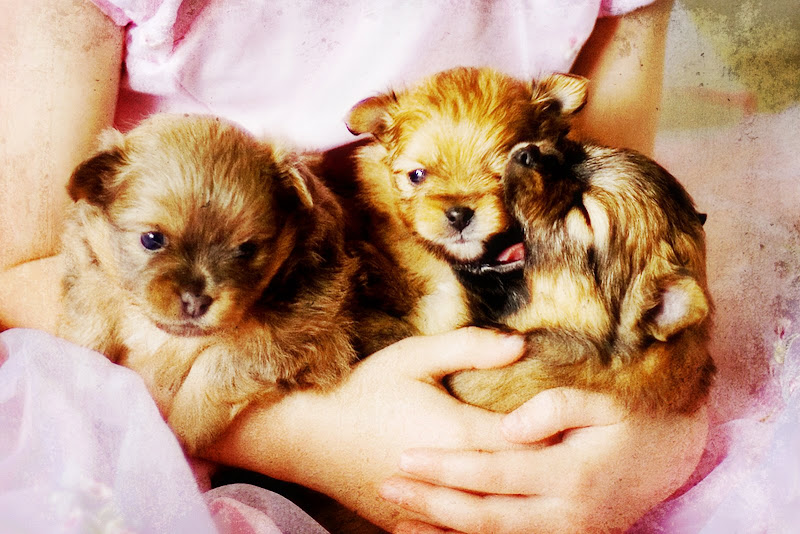
2. Open the photo you want to add texture to. (I chose a cute snapshot I took of the puppies my mom brought with her - that's another story you'll have to wait for). Also open the texture picture you just saved, so they will both be open on your screen. If you don't see them both, try making sure they are minimized by clicking on the square beside the red X on the upper right hand corner of the image.
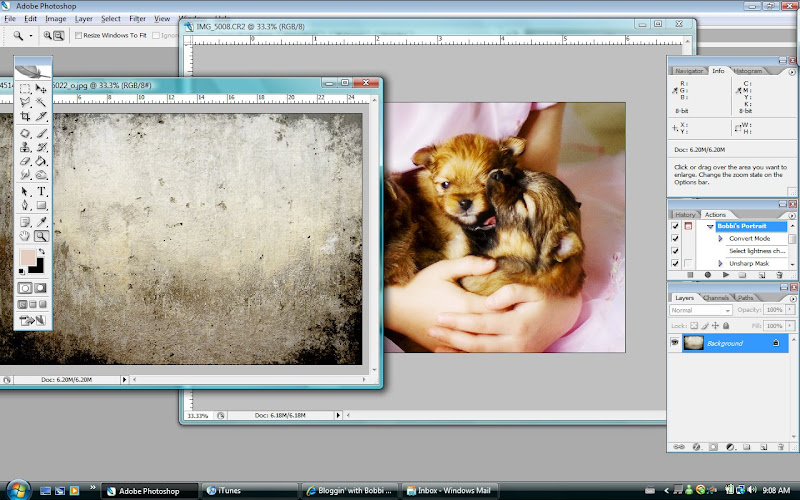 3. Make sure you've got the move tool selected on your tools palette, and click on the texture image. Holding down the left button on the mouse, drag the texture image on to your photo.
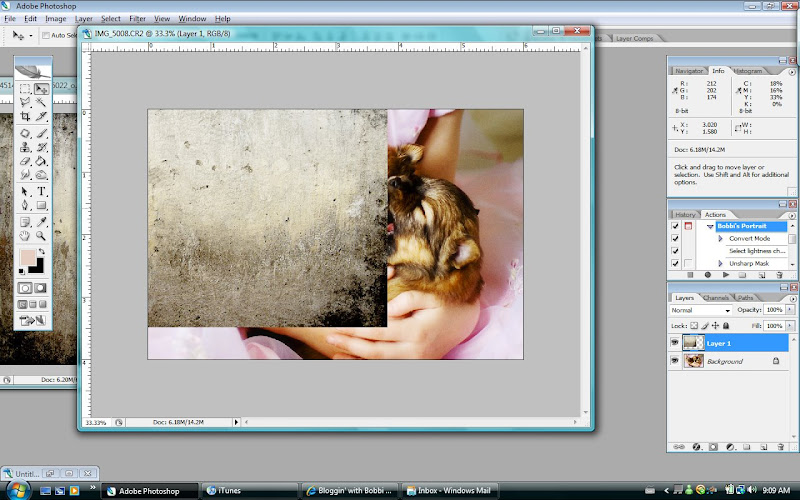
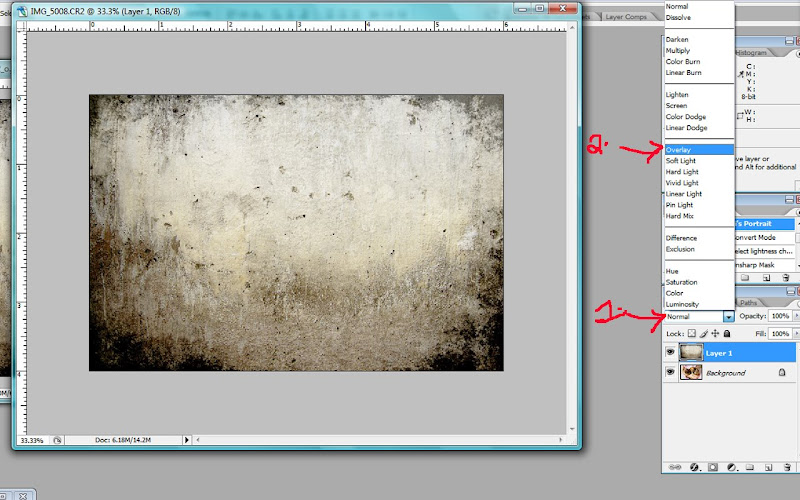
4. Center and/or resize the texture image so it completely covers your photo. You can do this by clicking on Ctrl+T then dragging the corners until the texture image covers the photo. Click on the check mark to accept the transform. Now you can't leave it like this - you can't see your photo! So, look over to your layers palette (bottom right hand side of the screen) and you will be changing the blending mode of the texture layer to "Overlay". Click on the little downward arrow beside the box that says "Normal" and from the drop down menu, select "Overlay".
 5. You may like the effect as is, but I wanted to lessen the overall effect a bit, so I changed the opacity of the texture layer to 50% - do you remember how to do this?
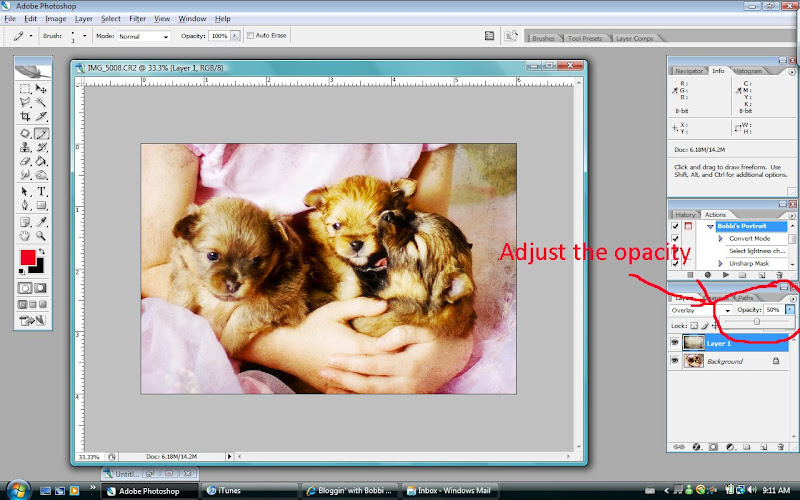
6. Voila! What fun, eh?
BEFORE:
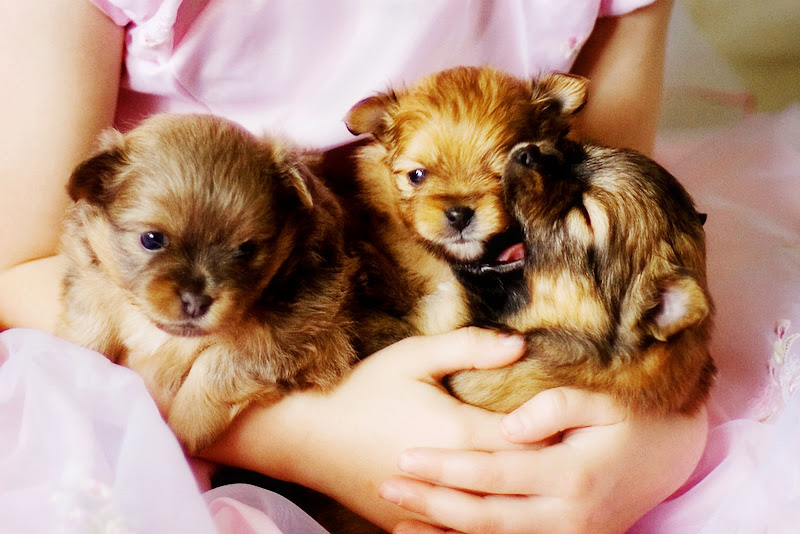
AFTER:
 For some variety with this method, play around with the different blending modes in step #4. Try "Soft Light", or "Hard light" for some different effects. Play around with different textures, or different opacities as well. There is no end to the creative possibilities! Next week I'll show you another way to use those same textures to achieve a different look. Now, go try this!

7 comments:
Thanks Bobbi- this looks like fun. The "free texture" link didn't open up for me for some reason--- can you email me the link you found please!
And looking forward to hearing how your weekend went! I hope you had a great time with family being in town and with your Daughters Babtizm. How exciting!
The link worked for me, so incase it didn't work for anyone else and they are going to ask...here it is.
http://www.flickr.com/photos/ghostbones/sets/72157603698161108/
One great thing about how you do your tutorials Bobbi is how you can explain things so simply. I know how to do this in Photoshop but I'd never easily be able to walk someone through it. My brain just doesn't work like that.
Besides that you just plain and simply have mass amounts of talent. Still not sure that's fair, but I can accept it. :)
Thank you so much! I really look forward to your tutorials (you make them so easy!) Thanks!
Once again, thanks Bobbi for the great tutorial and inspiration!! I wanted to let you know that I've nominated you for the Arte Y Pico award. You can check it out here: http://jentapler.blogspot.com/2008/04/yay-for-me.html
Thanks again for the great blog!!!
Bobbi-I'm new to your blog and the blogging world. A friend of mine passed your blog to me because of the tutorials you have. I have Elements 6, and just got it. Its very overwhelming. I was wondering if you know how to take shadows off of photographs of people? If so please please help me. I've been struggling with this. Love your blog. Josie
Hey - I just stumbled on your site by other links on other blogs - but seeing that you are doing photo shop tutorials - you might be interested in checking my brother's website out. It's called www.PSHero.com. He gives all kinds of AMAZING FREE tutorials. My brother is awesome and is all about helping others out and doesn't think you should be charged for it. Give it a look if you have a minute!
You have wonderful pictures by the way.
-Becky
Bobbi,
I happened upon your Photoshop tutorials and am amazed that you've taken the time to do this! Thank you so much! I'm brand new to photoshop, but love how you have made it all seem so easy.
I haven't tried anything yet, but am hoping that these will work ok in CS4.
Thanks!
Post a Comment