
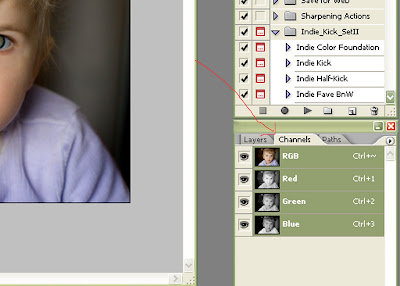
1. Open your photo in Photoshop (Not sure how to work this in Elements, but I'll try to find out). Click on "Ctrl+Alt+0" the "0" being the number 0. What this does is allow you to look at your image at 100%. This will really help you see the difference in sharpening. Now, look over to your right and see where your "layers pallette is. Right next to the tab that says "Layers" is a tab that says "Channels". Click on the "Channels" tab. You will see four different Channels labeled "RGB, Red, Green, and Blue". Click on the photos to see larger

2. Go to Image > Mode > Lab color to change lab color mode. You’ll now see that the channels have changed. There’s a Lightness channel with ‘a’ and ‘b’ channels which hold the color data. Do you see what I see here?

 3. Click on the "Lighteness" layer so only it is highlighted. Your image will turn black and white - IT'S OKAY! It's supposed to do that. It will revert back to color in a minute.
 4. Now we will sharpen the image using an USM (Unsharp Mask).I KNOW that Unsharp Mask seems like it would UNsharpen things, but really it's a sharpening tool :) To run an unsharp mask go to "Filter>Sharpen>Unsharp Mask" . Enter these values (you can change the values as you become more familiar with photoshop, but for now these are good kind of universal values to enter)
Amount: 110%
Radius: 1.0 pixles
Threshold: 0 levels
After you enter the values into the squares, you can see the difference it made by clicking on the little check mark beside "preview" underneath the "OK" and "Cancel" buttons. Can you see the difference? Make sure the preview button is checked again and click on "OK".

5. Now you want to change your photo back to color, so go to "Image>Mode>RGB Color" Your photo should revert back to color, and it will be sharper without the "halos" around each pixel. You can save your image now and close it. Save the changes. Wasn't that simple?
 Okay you Elements, users. You can still sharpen your image using Unsharp Mask (Enhance>Unsharp mask) and entering the same values as above. You'll notice a difference in the sharpness of your image too. Try it out!
No comments:
Post a Comment