1. Open your image - make a duplicate image - close the original. Now, zoom in close to the eyes (I like to zoom in at 200%). Click on the photos to see a larger version
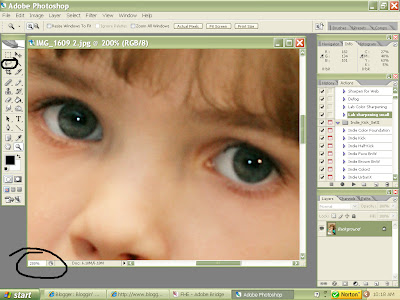
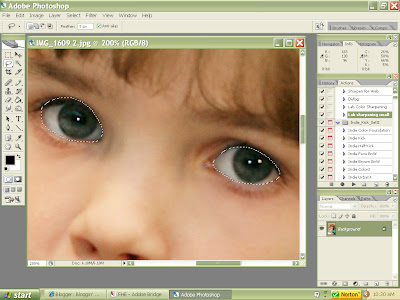
2. Select the Lasso tool (on the left hand side tool bar) and you will select each eye by clicking and holding down the mouse while you trace the eye. When you are finished tracing one eye, hold down the "shift" key and you can trace around the second eye without deselecting the first eye. You should now have marching ants around each eye - like so:
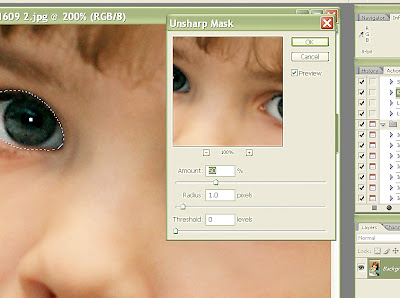
3. Now you want to run an unsharp mask on the eyes. This will whiten the whites and darken the darks a bit. Go to: Filter>Sharpen>Unsharp Mask and put your settings at: Amount: 50%, Radius: 1.0 px, and Threshold: 0. Click "OK"
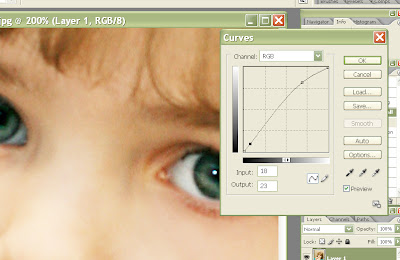
4. Now you can deselect the eyes (Select>Deselect). Now we are going to brighten the eyes with a curves layer - this will work with full version photoshop, though I'll tell you in a minute how to do something similar in Elements. Create a duplicate layer by clicking "Ctrl+J". We are going to really brighten this duplicate layer, but don't worry - it will all work out :)
5. We are going to make a nice bright layer by creating a Curve. (Image>Adjustments>Curves) This screen will pop up: Now click on the line new the top and drag it upwards. Keep looking at the eyes in the image until you like how the EYES look. Don't worry about the rest of the image, we are only focusing on the eyes. You can copy the curve I made, or play until you like the result.
6. Here is where we are going to isolate the changes you just made to the eyes. Click on the background layer in the layers pallette. Now click "Ctrl+J" to create a duplicate of the background layer. Now you will drag the copy of the background layer to the top of the layers pallette. The image should now look like it did before you made any changes.
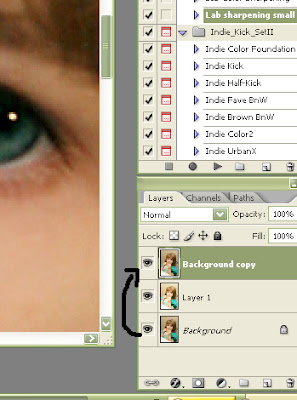 7. We are now going to erase the eyes of this layer, revealing the brightening that we did, but leaving the rest of the photo as it was before. Select the eraser tool from the tools pallette to the left of the screen. Resize the brush until it fits just over the iris of the eye, and be sure that the opacity of the brush is set to between 20-40%. Now position your eraser over the iris of the eye and click until you like the result. You don't want the eyes to look phony, just brighter!
Repeat on both eyes until you like the result. If the "pop" is too much, simply select the "Layer 1" layer on your layers pallette and decrease the opacity to 80% or lower until you like the result. When you are happy with the "pop" on the eyes, just flatten your image and save! It can make a beautiful difference! Click on the photos to see a larger image.
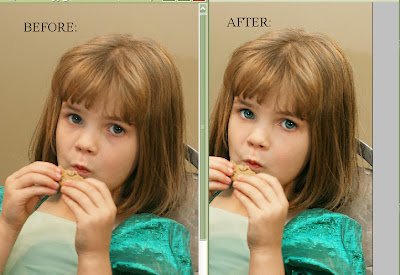
This technique will work best on a photo where the subject is larger (filling most of the frame).

2 comments:
This is exactly the tutorial I have been looking for Thank-you so much
How do I do it in Elements?
Post a Comment