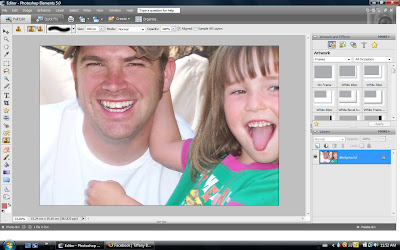
1. Open your photo. For this example, I'm using Photoshop Elements 5.0 - but this will work exactly the same way in full Photoshop. You will want to use the magnifying glass tool to zoom in close to the part where the red is showing.
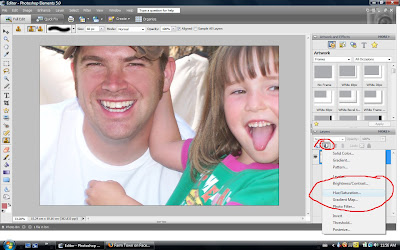
 2. Over to the lower right hand side of the screen, you will click on the little half white/half black circle. This will bring up a list of Adjustment layers you can choose from. Click on "Hue/Saturation".
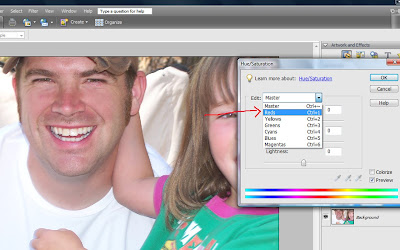
 3. A little box will pop up. On the top drop down menu, click on the little arrow and instead of 'Master', you will choose 'Reds'.
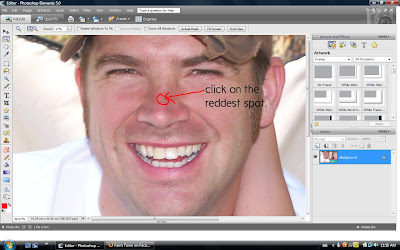
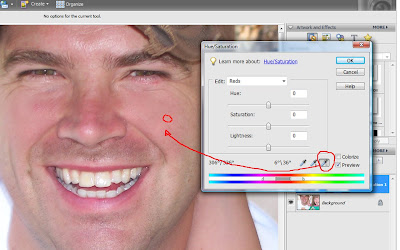
 4. Now, you'll notice if you move your mouse anywhere over your photo, you'll see a little eye dropper tool. Click once on the part of the face which is the reddest. On this photo, it would be somewhere like where I drew the red circle.
 5. Click on the little eye dropper tool on the pop up box that has a (-) sign next to it. I have it circled on the example below. THEN click once on a part of the skin that is the color you want it to be (a non-red part of the skin).
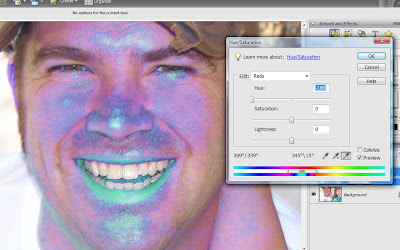
 6. Okay, don't freak out. We are going to click your mouse on the little slider right below "Hue" and drag it ALL the way to the left. You're photo will turn all kinds of strange blues etc. This is to help, don't worry! (though my brother does look kinda nice with blue lips!)
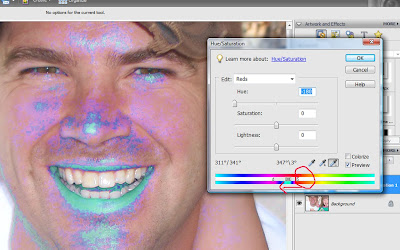
 7. On my example below, I circled a little slider which is at the bottom of your pop up box, and to the right. Slowly slide that little slider to the left until the photo only shows blue on the reddest parts. The rest of the skin should turn back to normal color, leaving only the red parts highlighted in blue. Does this make sense?
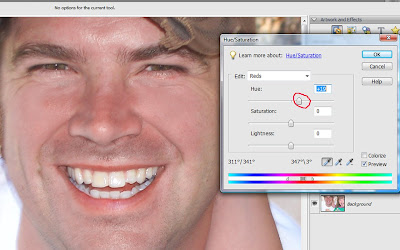
 8. Now, remember that slider you slid ALL the way to the left? You will slide it back to the right until it reads anywhere from 10 to 20. It should end up just to the right of the center point under "Hue". You want to drag it until the red color goes away and it becomes the right shade. Look at your photo as you drag the slider to the left. Mine looked right at about 19. Click OK when you are satisfied with it.
 9. Most of the time when you do this, it will change some parts you WANT to stay red, like lips. So, make sure your foreground color is set to black (the two little squares to the bottom left of your screen, on your tools palette - I have them circled in red), then click Alt+Backspace and it will fill in your white layer mask with black. This will make all of the red reappear.
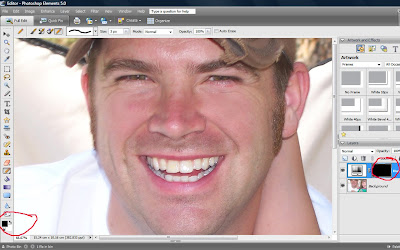 10. Now you will choose a soft brush, set it at about 50% opacity or so, then choose white as your foreground color. Making sure you have the black layer mask selected, paint over the red parts and you will watch them magically disappear! You will be able to see on your black layer mask where you have painted. If you make a mistake, just re-select black as your foreground color and paint back the original color. Flatten your image when you are satisfied!
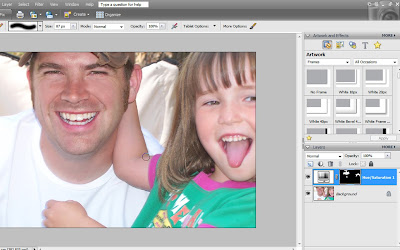
BEFORE:

AFTER:

Okay, not the best example. I can hardly see a difference. I was looking in my photos for a good example of redness in the face, but couldn't find one. BUT, these steps do work. I've used this technique dozens of times, and it saves photos, trust me. This works the exact same way in either Elements or Photoshop. Love it! Here is another example, maybe easier to see:


1 comment:
You know what my problem is?
I can't always figure out that a picture has too much red or is a bit blotchy or has some other minor flaw that keeps my pics looking amateur while yours looks fan-stinkin-tabulous!
Sigh... I thought the guy looked great! until I saw him "tweeked".
Impressed.as.usual!!
Post a Comment