I think I did a tutorial on this a couple of years ago, but it's such a useful one I'm going to repeat it. I am planning a super fun scrapbooking "retreat" at my house with my fab sister from Calgary, and I am planning to make quick work of creating a scrapbook about our recent trip. Now, for me to make quick work of a scrapbook it means I can't print every photo as a 4X6 or I'd be there for weeks trying to fit all my favorite photos in. The answer? Printing several in smaller sizes.
Normally I would crop my photos to a 2X3 or so, then drag and drop them onto a 4X6 canvas for ordering the prints. Have you done it this way? I'm going to show you Photoshop users a faster way. Now, this doesn't work exactly this way in Elements, however if you go under File>Print Mulitple Photos (I think) you can choose to create a contact sheet in there.
Okay, lets get started!
1. Open photoshop, then open all of the photos you want to print in a smaller size. In this example I opened 4 photos, made sure they were cropped at a 2:3 ratio ahead of time, then minimized them. You don't have to minimize yours, I just did so you can see the pop up screens easier. So, are your photos opened in Photoshop? Good.
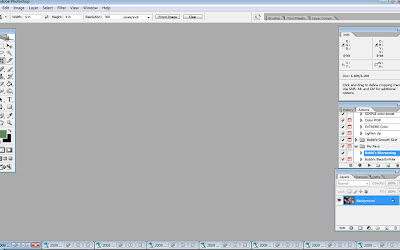
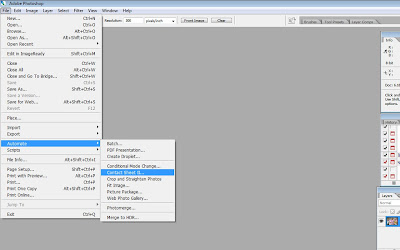
2. Click on File>Automate>Contact Sheet II
 3. A screen that looks like this will pop up. First thing you do, you enter in the values of the sheet you will be printing them out on. So, for my example, I wanted to fit four photos onto a 4X6 print at 300 dpi. I entered those values to the left of the red bracket in my example below. If you want to fit several on an 8X10, or any other size - enter those values below.
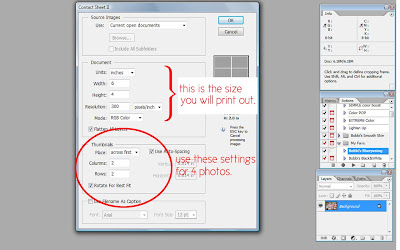 Then, under "Thumbnails" you'll enter how many photos you want on the sheet, how many rows and columns etc. Click on the box beside where is says "Rotate for best fit", and the box where it says "Use Auto-Spacing". You'll see what it will look like on the upper right hand side of the pop up box. You can see mine will fit four photos on my 4X6 canvas. When you are satisfied with your settings, click OK.
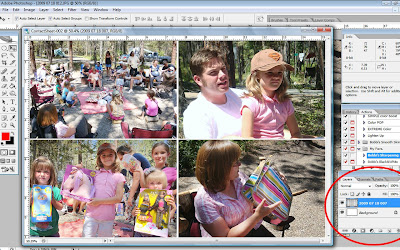
4. Your program will now automatically crop, rotate, and place your opened photos onto a 4X6 canvas (or whatever size you indicated in the previous step). You'll notice in the layers palette that it is not a flattened image, so before saving just be sure to flatten. Save it as a jpeg wherever you normally save your photos, then order with your regular prints! Done!
Tips: Your original photos will not be altered and will remain open after you make these contact sheets. No worries.
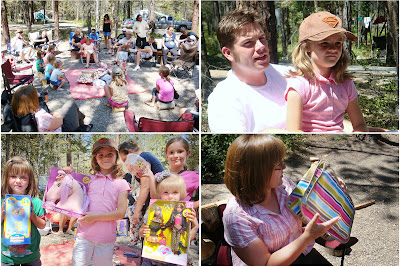
Make sure all of your photos are already cropped to the same orientation or they won't be the same size on your contact sheet. For example, you can see on this sheet 3 of the photos were cropped to a 2:3 ratio while one of them was 5:7 - so it's sized differently on my contact sheet. For my uses it won't matter, but if you want all of your photos to be evenly spaced and sized the same make sure after you open them that they are all cropped to the same ratio.
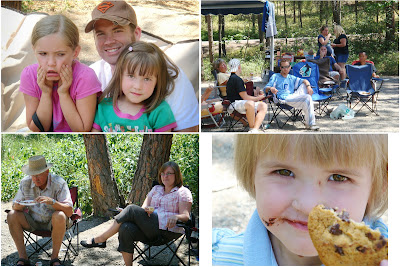
I have opened 32 photos and had them all made into contact sheets like this within seconds. What a time saver!! Hope you can get use out of this tutorial!

4 comments:
I'm having a hard time with these tutorials...
I think I need to buy photoshop first??
ah- yes that is very nice--- thank you.
Printing contact sheets is possible in PSE too (from organizer, choose print multiple photos), but as far as I know without the flexibility of PS to choose the size. The prints become too small for scrapbooking even with just 2 on each page (I have PSE5).
Very cool! I'll have to remember this next time I make a collage on my blog too. THANKS :)
Post a Comment