1. Open the photo you'd like to add text to. Make sure your photo is cropped to the size you want to print at. Often when I photo comes right from a card, the file size is ginormous! Even if it has a 4X6 ratio, it may not be sized to 4 in by 6 in at 300dpi. So, a good first step is to select the crop tool from your tools palette, enter in your dimensions at the top of the screen, and crop your photo before doing anything else.
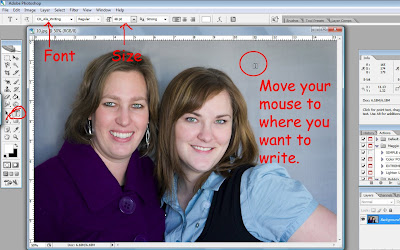
Once you've done that, you are ready to add some text. First, choose the text tool from your toold palette (the one that looks like the 'T'). A couple of boxes will appear at the top where you can choose your font and the font size. Really, the font size isn't super important because I'll show you how to make it larger in a second. You can also choose the text color, if you want it to be bold, italic, etc. Then, move your cursor to the spot on the photo you want the text to go. Don't worry - you'll be able to move it around if you want, so it doesn't have to be perfect.

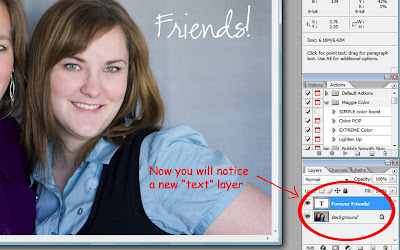
2. Start typing your text just like you would in Word or any other program. You will notice to the bottom right, on your layers palette, that you now have a new text layer above your photo. When you are done typing, click the little checkmark to commit (oooh, are you really ready to commit?) to the changes. Now you will have your text layer highlighted in your layers palette.
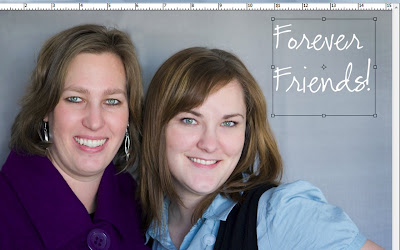
 3. You can leave it as is, or adjust the size of the text. You do this by clicking on Ctrl+T (which activates the Transform tool). When you click Ctrl+T you will see a box with a bunch of little points marked around the edges like so:
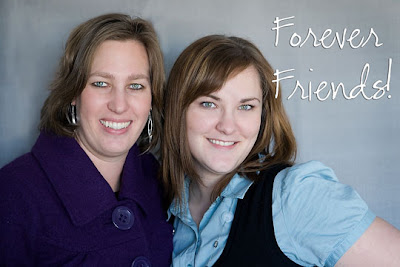
 Simply click on one of the corner boxes and, while holding the mouse button down, drag slowly outward until it's the size you like. You can also drag one of the points on the edges if you want to skew the text, or on the corners to keep the same proportions. When you are happy with the results, again click on the checkmark to commit to the changes! You can then add a little drop shadow or other layer effect, or whatever - flatten and save! Voila! You're done!

No comments:
Post a Comment