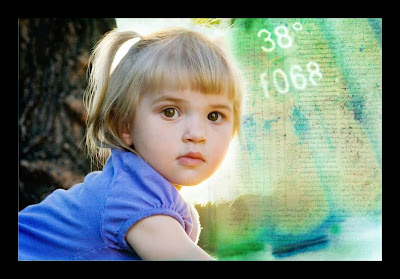
I came across a fun tutorial HERE which shows you how to make a gorgeous collage with three images. I couldn't wait to try it out, so I'll show you my steps here, or you can visit their website to see how they did it. What you need first is three images you want to blend together. They could be anything!
You can download many very interesting free and inexpensive images to use in your collages.
I got the metallic one from here:
http://www.imageafter.com/image.php?image=b10light_fx017.jpg
For the text photo, you can simply scan a page from a book or encyclopedia, or download photos from places like the Library of Congress, or where I got this one: http://www.ibiblio.org/expo/vatican.exhibit/exhibit/d-mathematics/Greek_math2.html
So, once you have your three images you're ready to get started. Let's go!
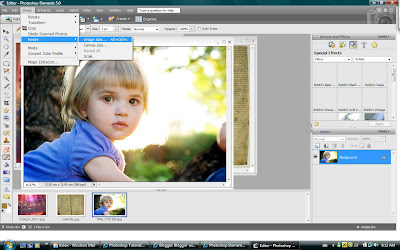
1. Open all three images in elements. Resize the photos so they are all the same width, height, and resolution before you begin. (Go to Image>Resize>Image Size) Make sure "Resample Image" box is selected. Just make sure each image has roughly the same dimensions entered in)
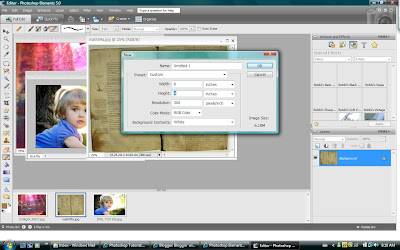
2. Now you will create a new document (Ctrl+N) and enter the same dimensions in as your did when you resized your photos. In my case, I entered a width of 6 in, and a height of 4 inches - at 300 dpi
3. Okay, now you will drag one image onto the new document you just created. Click on the image you will be dragging (in my case, the pink metallic photo) so that it pops to the top of all the images. (Make sure you have clicked on the move tool in your tools palette) Now click somewhere in the middle of the metallic layer and drag it over (while holding the mouse button down) and drop it (unclick) over the white document you created. It should place a copy of the photo on your document. Straighten the photo so it's centered on your document. Once it's centered, click "enter" or click on the green arrow to accept. Now you can close the original metallic photo if you want (I like to keep my digital workspace clean - LOL!)
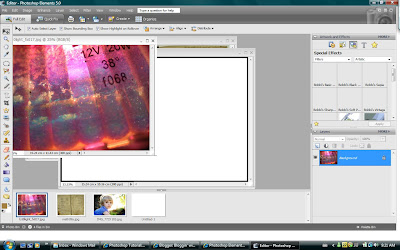
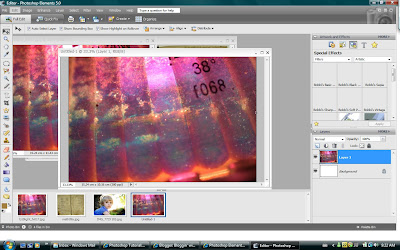
4. Now you will change the blending mode of the metallic photo layer from Normal to Difference. It will react with the white layer below to create some beautiful blue and green tones.
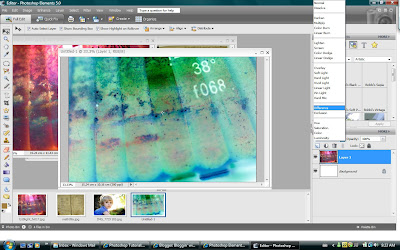
5. Repeat the above steps with your second background type photo (in my case the text photo). It will cover your metallic layer, but we'll fix that in the next step.
6. Change the blending mode of the text photo from Normal to "Overlay" in your layers palette. Now it will blend in with the other photo you added before. Neat effect, eh?
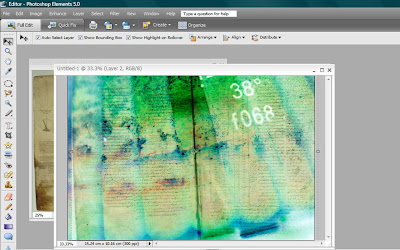
7. Create a new Levels adjustment layer above the text layer by simply clicking on that little half-white/half black circle above your layers in your layers palette, and click on "Levels" A little screen will pop up - don't make any changes, just click "OK". You'll notice that now you'll see a new adjustment layer that contains a layer mask filled with white (a white box next to another box with a histogram looking thing). We'll use this layer mask later.
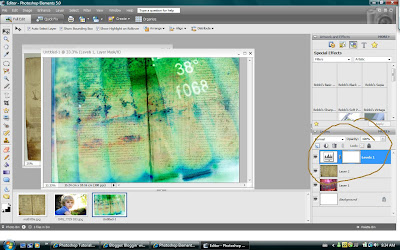
8. Here is where we now drag the portrait photo onto our new document, right on top of the other layers. Just follow the same steps as before, clicking and dragging the photo on top, then moving it around so it is centered.
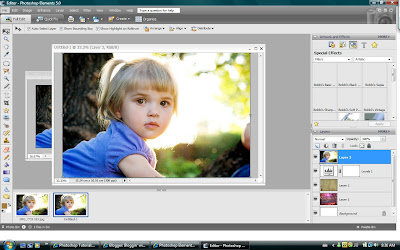
9. Now, making sure the portrait layer is selected in your layers palette (highlighted) click "Ctrl+G" to create a clipping group with the levels adjustment layer you just created. This is binding the two layers together without flattening it. You'll see why we need to do this in a minute. If you look over to your layers palette, you should now see a small downward pointing arrow to the left of your portrait layer.
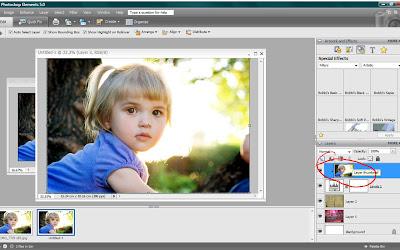
10. Select (click on) the mask (the white square) on the Levels adjustment layer. Select the Gradient tool (looks like a rectangle with a color gradually changing - I circle it in the photo) and choose the Black to White gradient in the Gradient Picker.
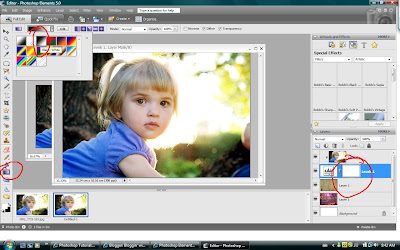
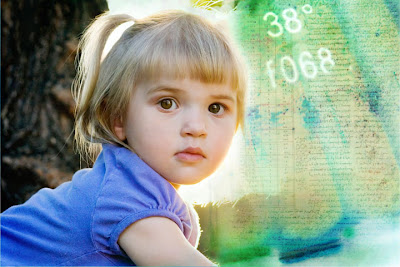
11. Starting at the far right of the page, click and drag a line to just touching the girl's hair (while holding down the mouse button). Then let up on the mouse. In other words, start the gradient at the point where you want the two images to merge and stop it where you want the transition to end. (On the layer mask, black hides the pixels on the girl's portrait to reveal the layers below.) If the background shows up too much on your portrait's face, you can use the paintbrush tool with the foreground set to white, and paint back over the spots on the portrait you want to have show up again. When you're happy with the result, flatten and save your new image!

3 comments:
Such a neat concept! Thanks for sharing this week.
Oh that is SO cool! You are learning so much!
I don't comment enough. I love love your blog and all the knowledge etc... you share. I really want to know how to make the borders you do when you post pictures.
Post a Comment